How to use our NFT drop smart contracts
In this article we will go step by step into how to use our NFT drop smart contracts. We will use the Rinkeby testnet. That way we won’t spend any real ETH and it won’t cost us anything to test.
Sep 20, 2022
●
10 min read
Creating the smart contract
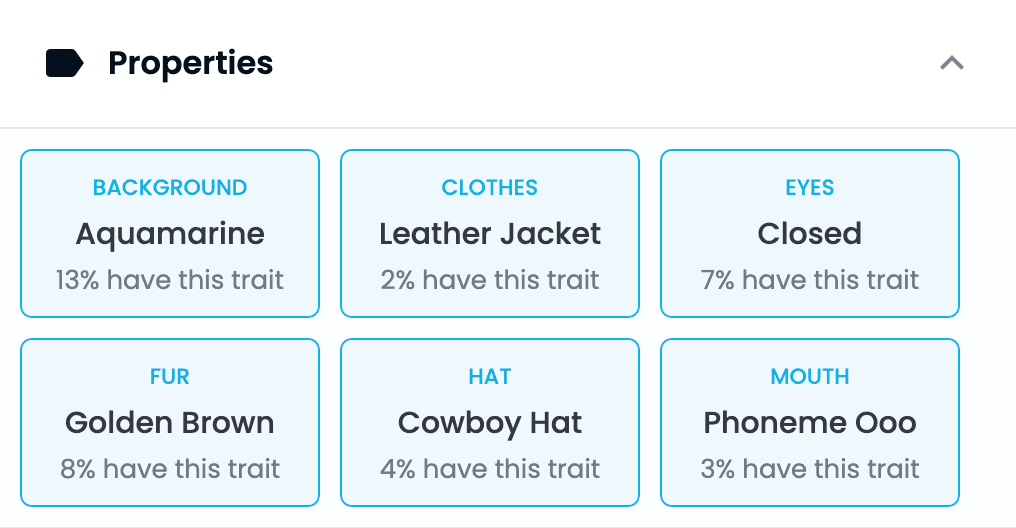
The first part will be to create the NFT drop smart contract. This is where we will be uploading the images into the smart contract, setting the price and number of NFTs we will be dropping on our private and public sale, adding the list of whitelisted addresses (if any) or the reveal later image.
1. Set basic details
Once you go to our <span>smart contracts tool</span>, click on “Connect Wallet” and you will be taken to the smart contracts dashboard where you will be able to deploy your NFT drop smart contract.
You can connect with the Rinkeby network so you can test our whole tool without connecting through the Ethereum network or spending real ETH.
If you need some fake ETH (Rinkeby ETH) you can get some from the faucet here: https://rinkebyfaucet.com/
That will allow you to use our entire tool without spending real ETH.
Once you log in with your wallet using the Rinkeby testnet the website will look like this:
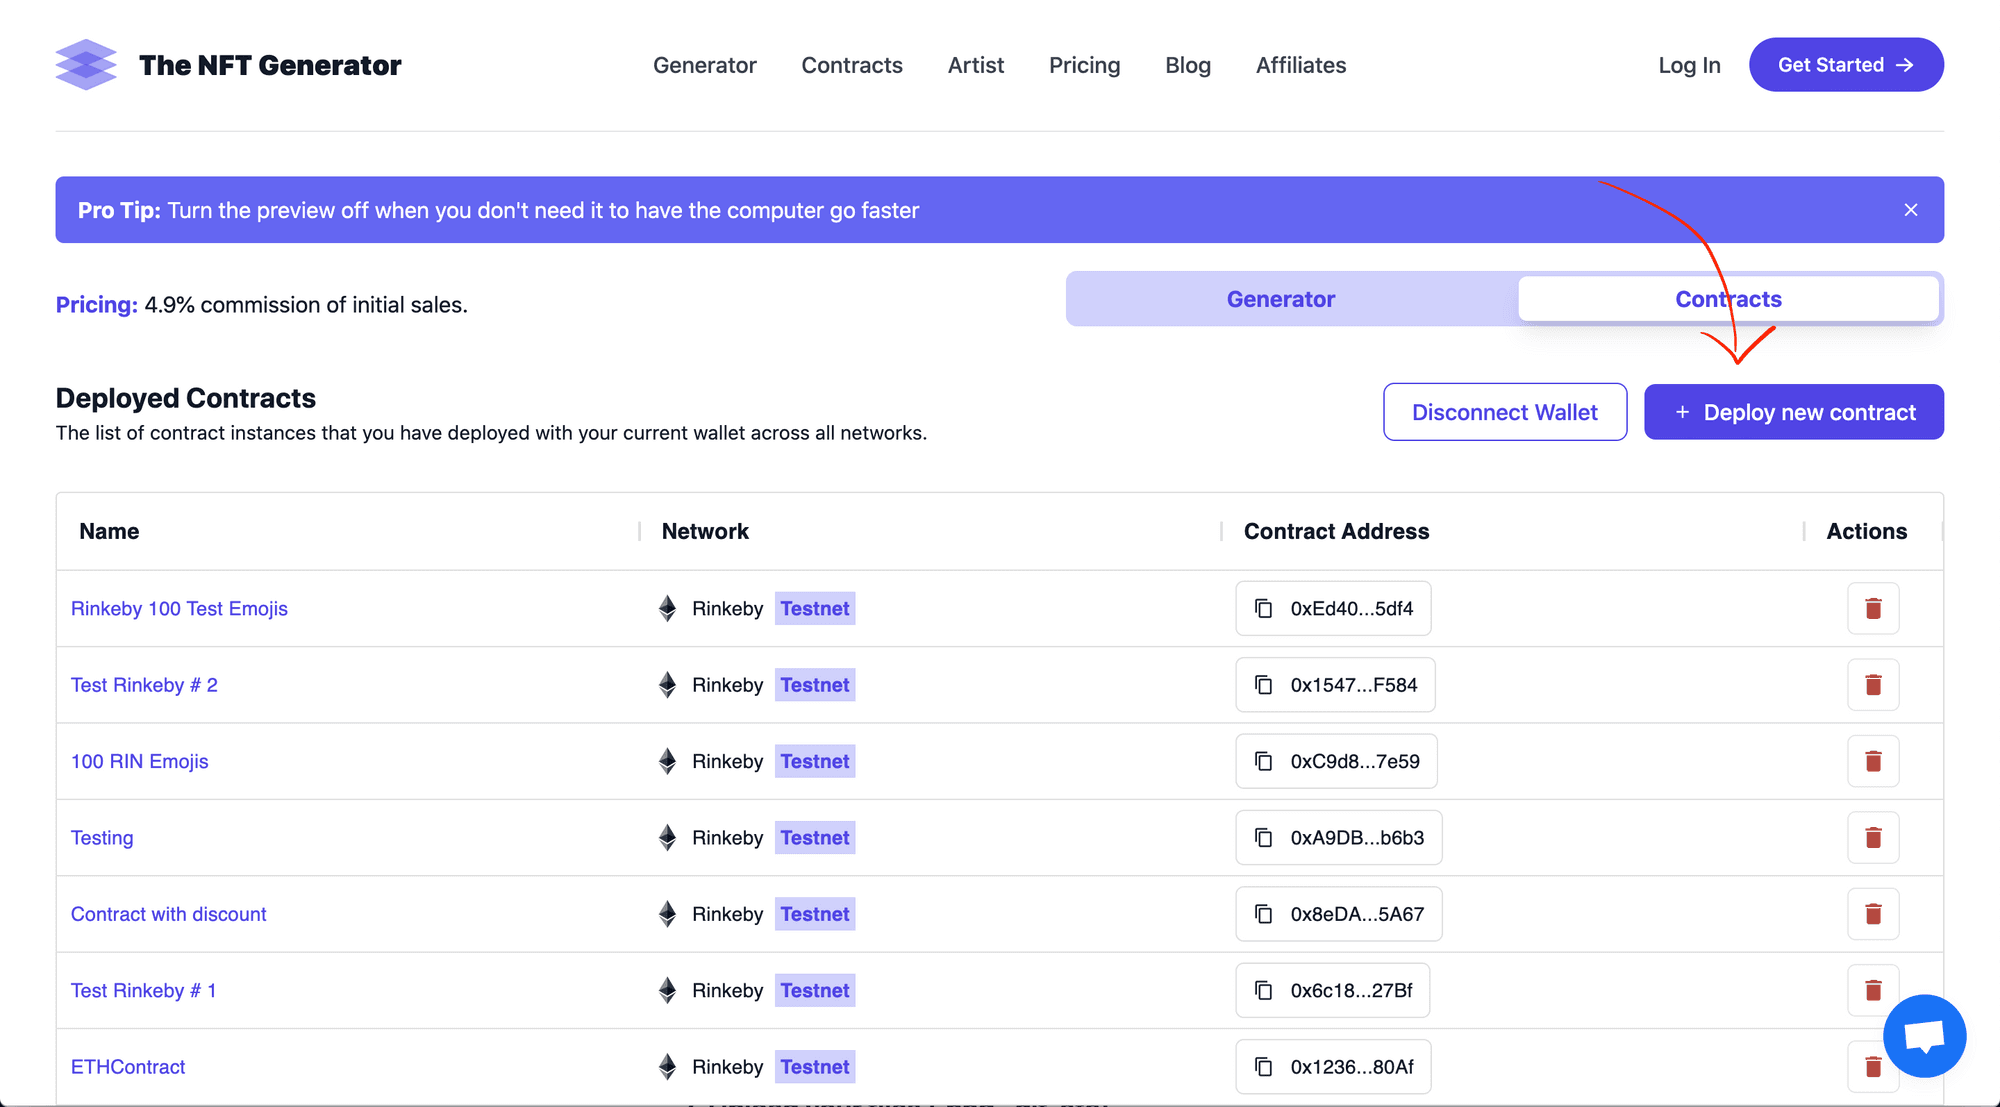
NFT drop smart contracts dashboard
From there you can click on “Deploy new contract” and it will take you to this page where you can set the basic details of your upcoming drop. You will be able to upload your images and set the conditions for the sale later on.
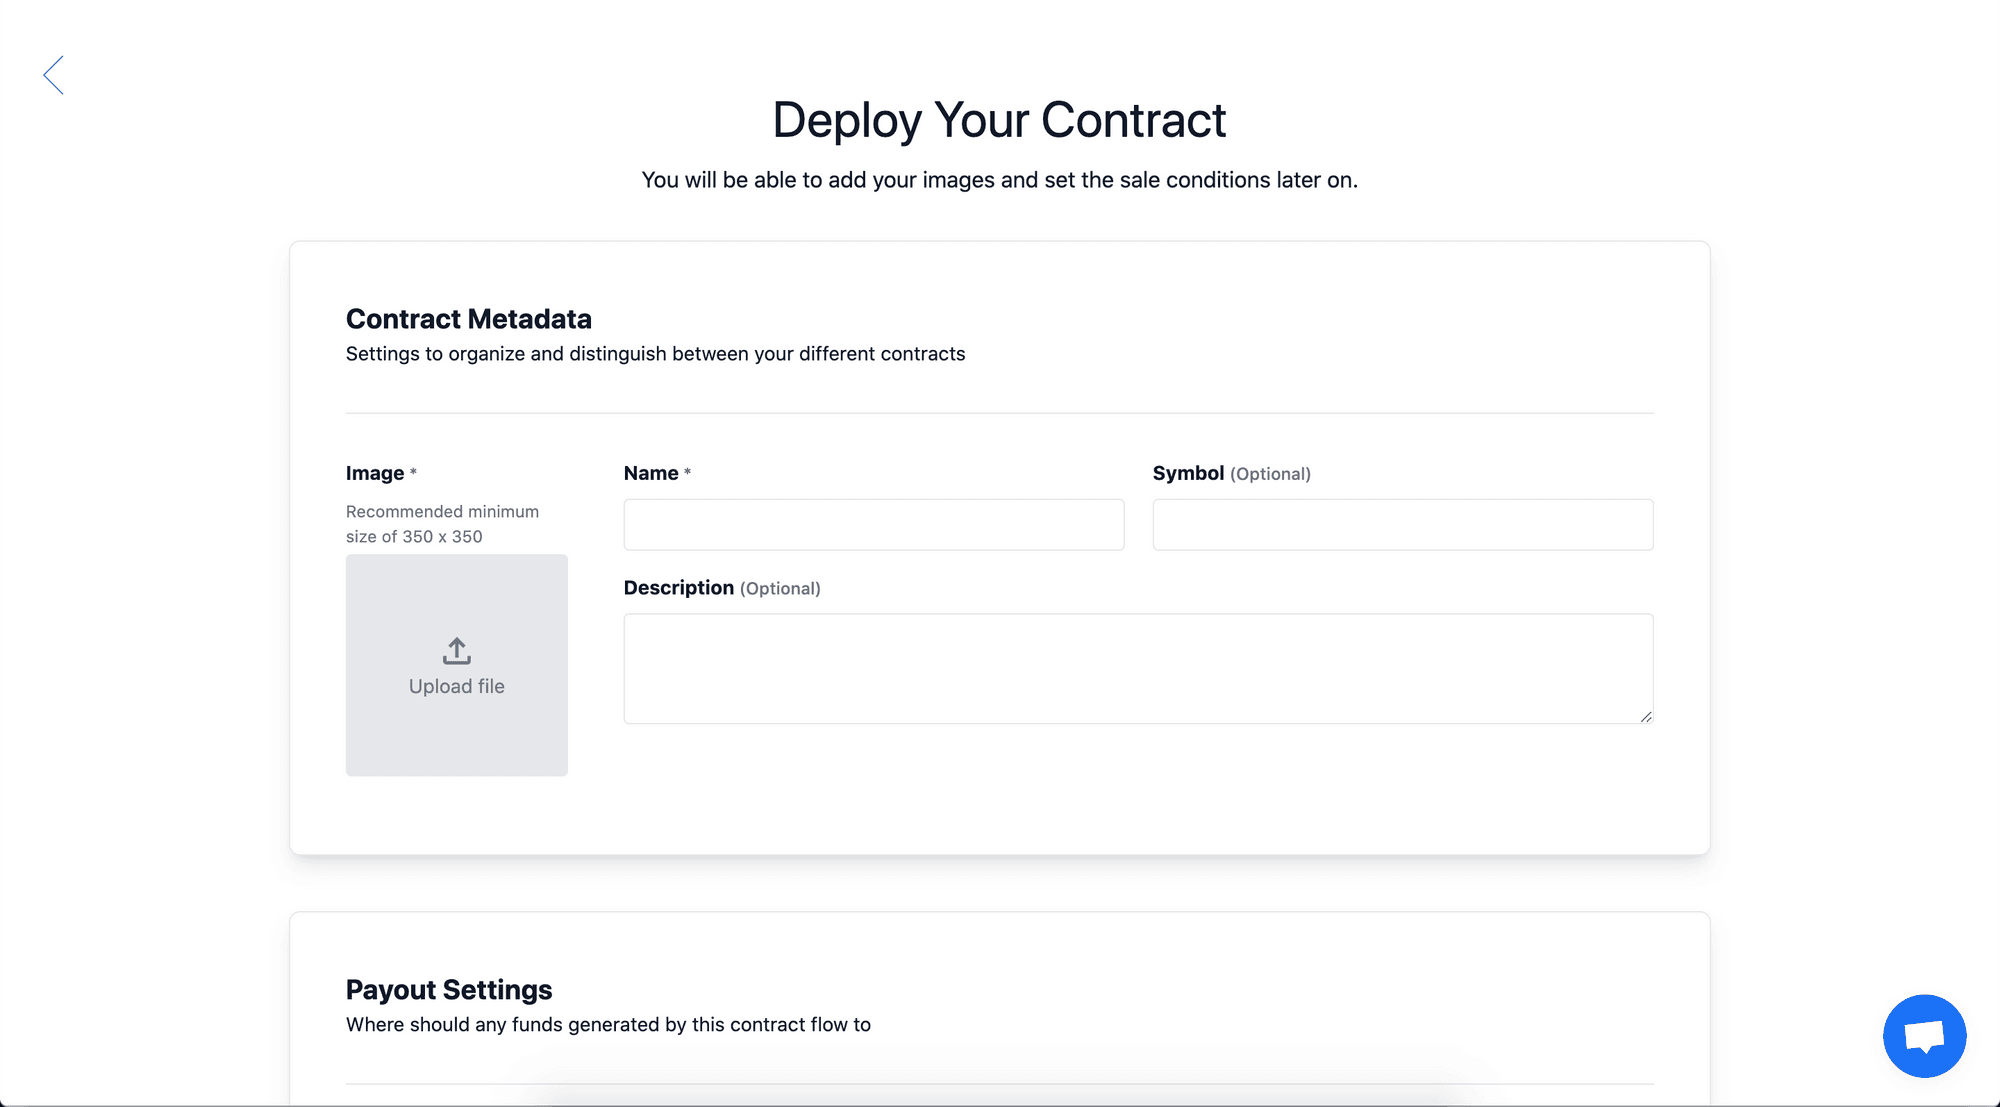
At this stage you are only required to fill out the name, description, image for the contract as well as the address to which the proceeds of the mint will be automatically fowarded by the smart contract as well as the royalties that you want to charge for secondary sales.
Our contracts are lazy-minted which means they’re super gas optimized. It also means that the NFTs will start to show up on OpenSea as they are minted by your community.
At the time of writing deploying a contract on the real Ethereum mainnet would cost you about $30 - which is pretty good.
The NFT Generator only charges 5% of the initial mint and it charges nothing on secondary sales. However, if you feel this is too high reach out and ask if we have any active discount codes at the moment.
2. Upload your files (.png, .gif, etc)
Once you create your smart contract you will be taken to this page where you will be able to upload your 10,000 images that you previously generated - hopefully using our generator ;)
You don’t need to have generated the images with us to be able to use our NFT drop smart contract tool. You can simply drag and drop the files along with the metadata.json and follow the steps that are shown on the screen.
Once you upload your images your dashboard will look like this:
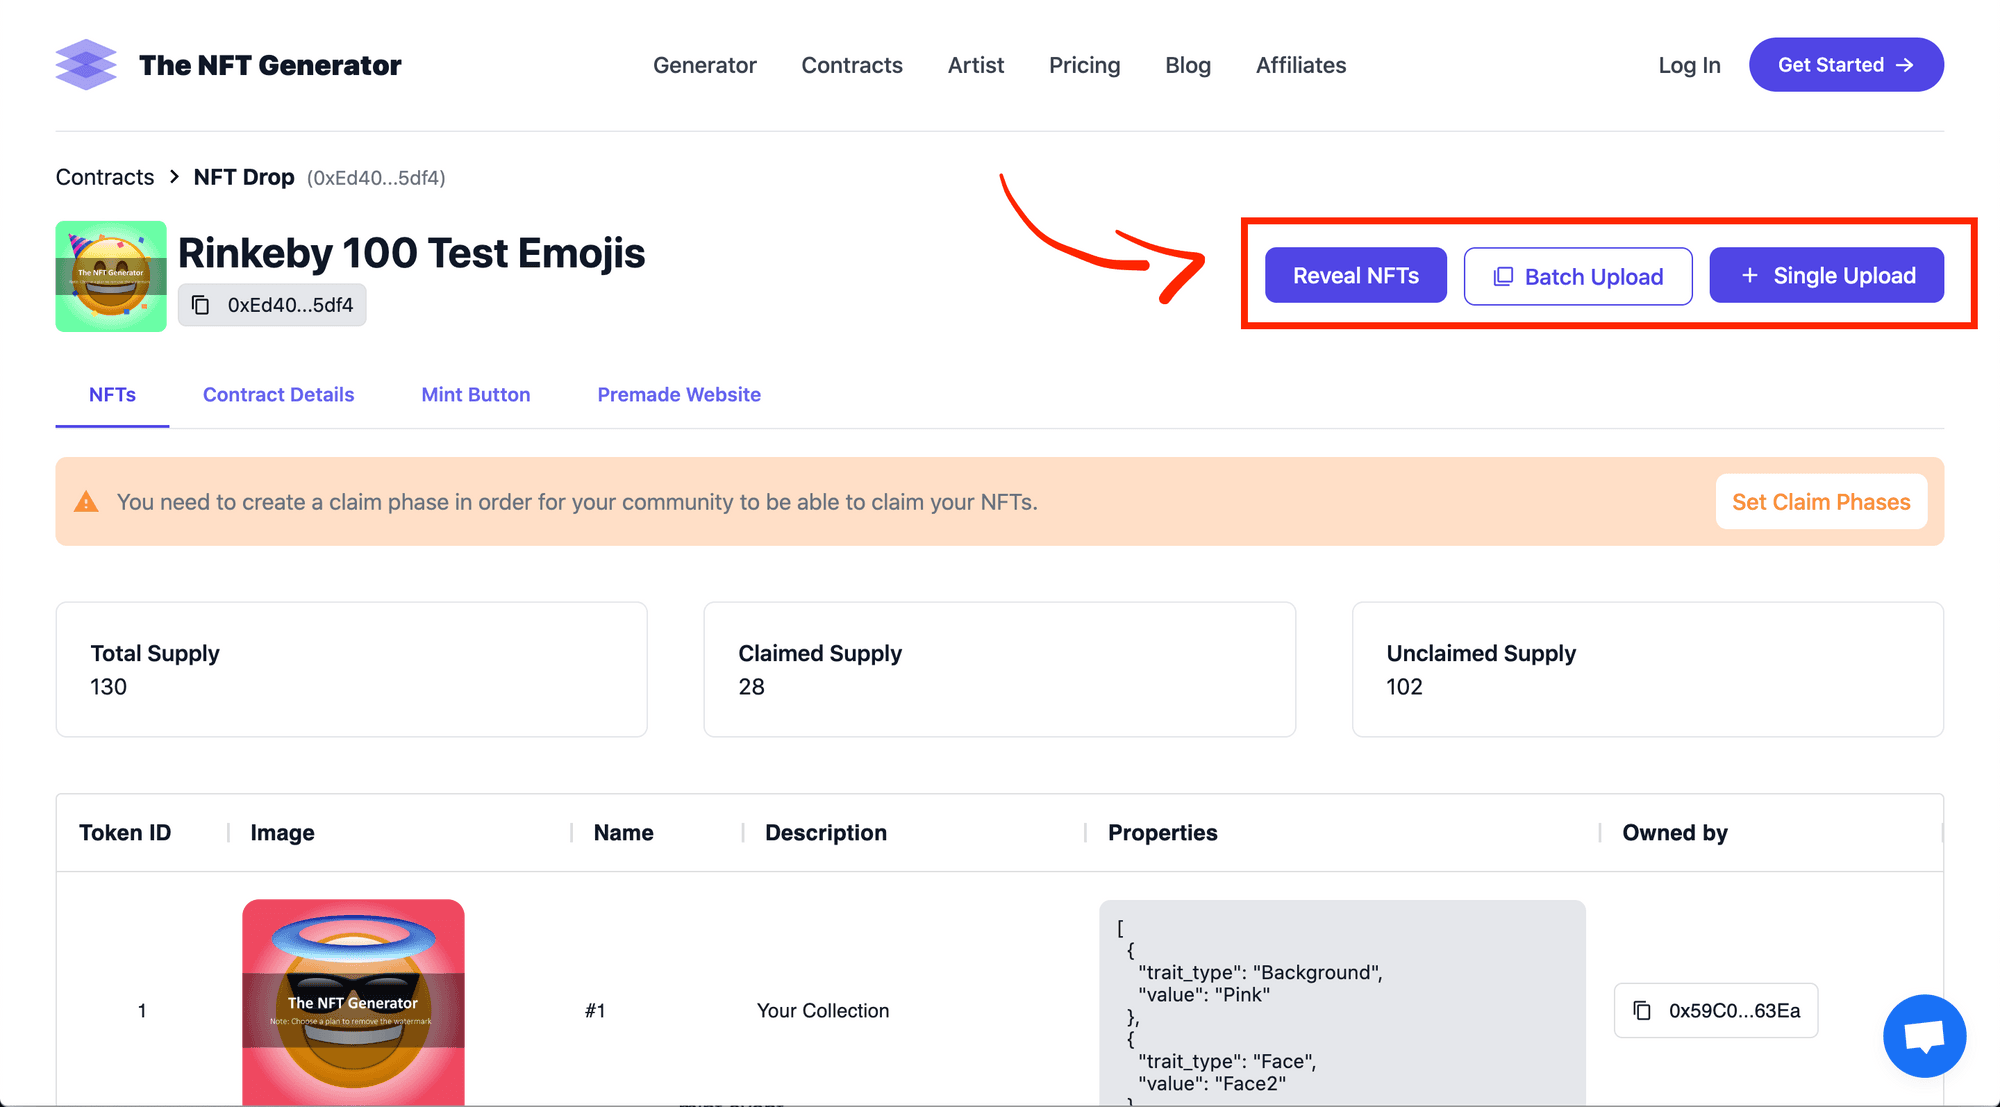
As you can see the images will show up along with their corresponding metadata. If you need to upload another batch, to reveal your NFTs or to upload one NFT that you might have forgotten you can do so from the 3 buttons at the top right as they are shown on the picture.
You can also see from the previous picture that there is a notice saying you need to set up a claim phase for your community to be able to mint your NFTs.
What that means is you need to set the conditions for your pre-sale, public sale and so forth. If you do not mention and what price and how many NFTs are you going to drop at each claim phase then it would be difficult for your community to mint your NFTs.
3. Set the claim phases (private sale, public sale, etc.)
Click on the button that says “Set Claim Phases” and you will be taken to the section where you will be able to create the conditions for your private sale, public sale, etc.
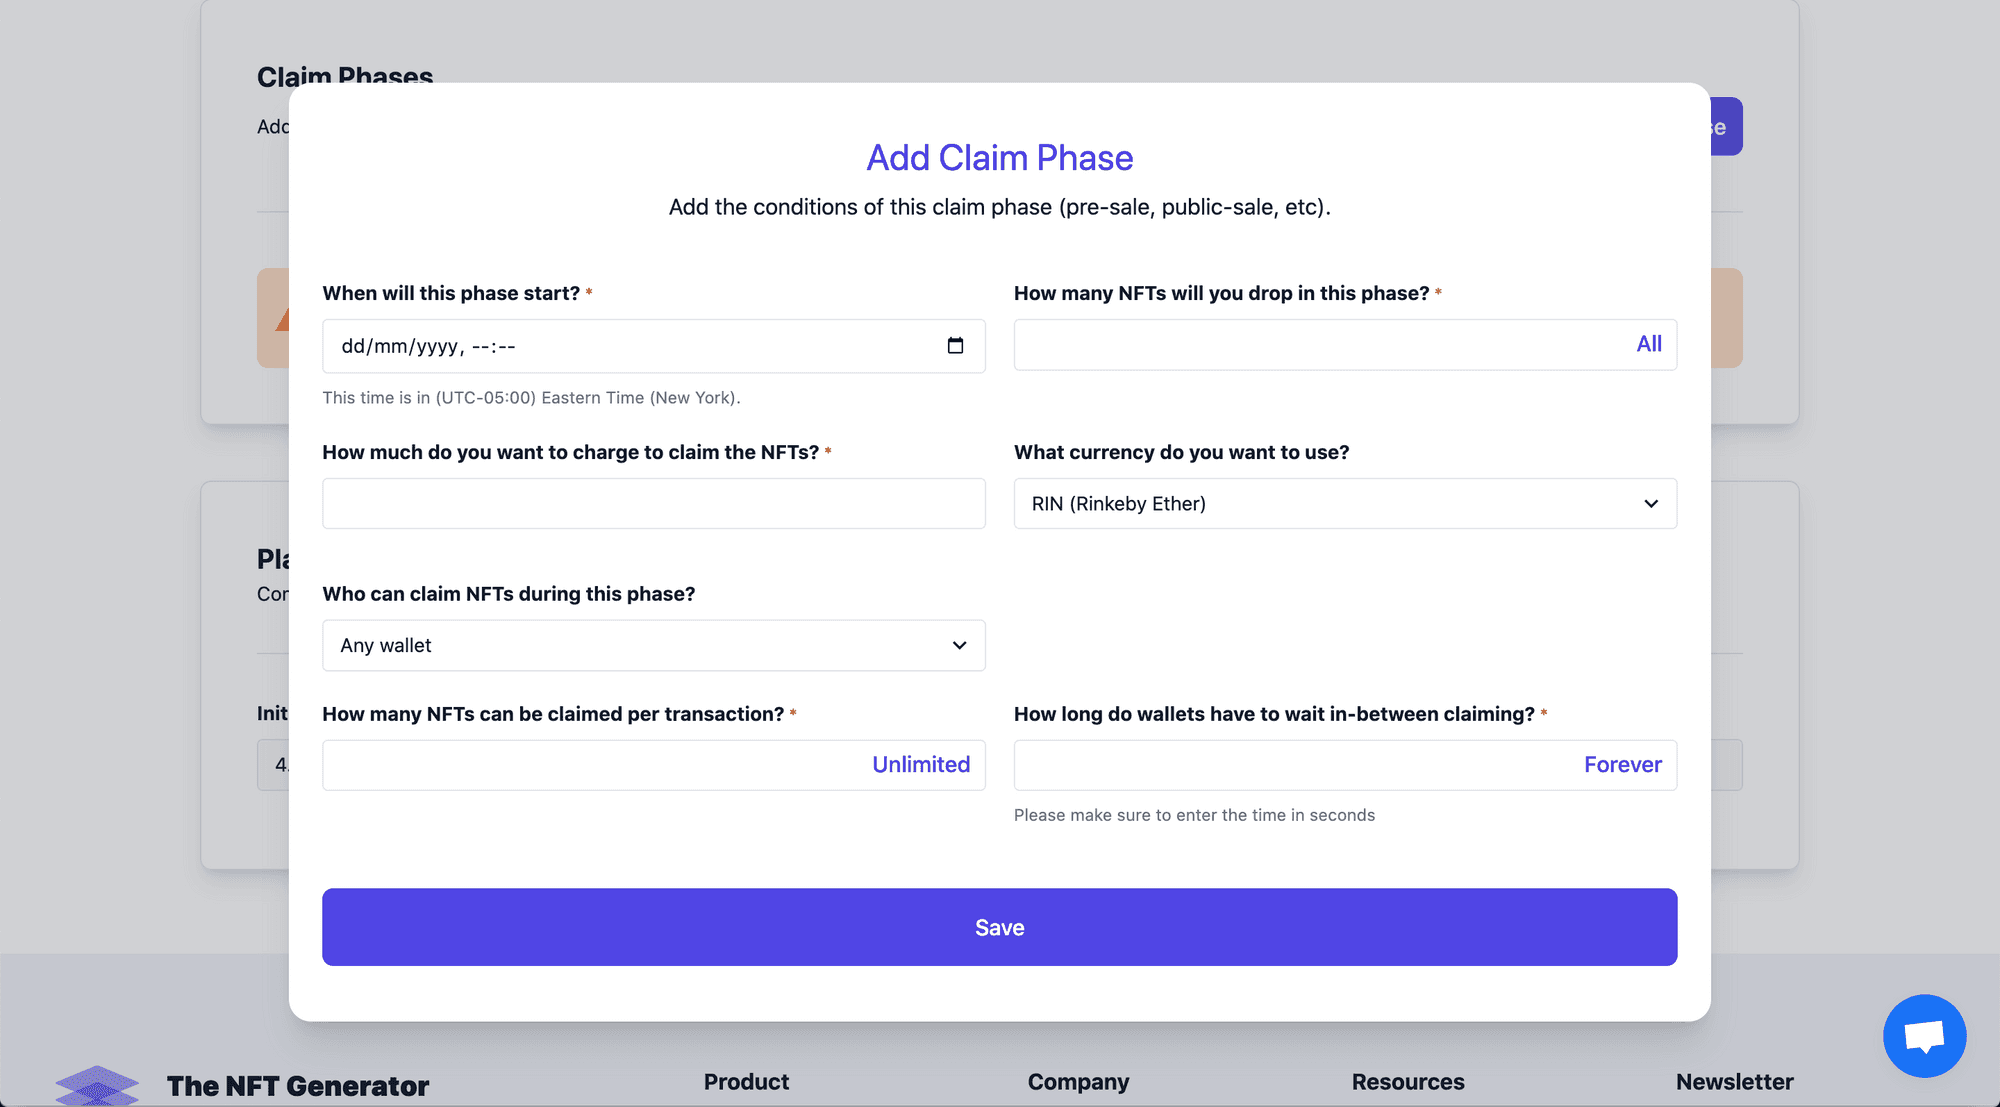
As you can see on the picture above you can choose when you want the sale to start (before that specific date and hour your community won’t be able to mint your NFTs, so the mint button won’t do anyting before the time arrives).
You can also select how many NFTs you will drop in each phase. For example, you might want to drop 1,000 NFTs on your private sale and then 9,000 in your public sale.
You can select how much do you want to charge for each NFT on each phase. Normally, the price would increase as you move from private sale, to pre-sale, to public sale.
And you can upload a list of whitelisted addresses in case there is a whitelist to mint the NFTs as well as how many NFTs can be claimed per wallet or how long does a wallet have to wait to claim again in case that person wants more.
A question that we often get is if free mints are allowed. The answer is yes, they are allowed. You can simply enter 0 at the price you want to charge for your NFTs. However, it is not recommeneded. The reason being that from what we see most free mints don’t do well. People don’t value what is free as much. While there have been notable exceptions such as CryptoPunks, the market has changed and what we see is that they usually don’t do well. However, the choice is yours.
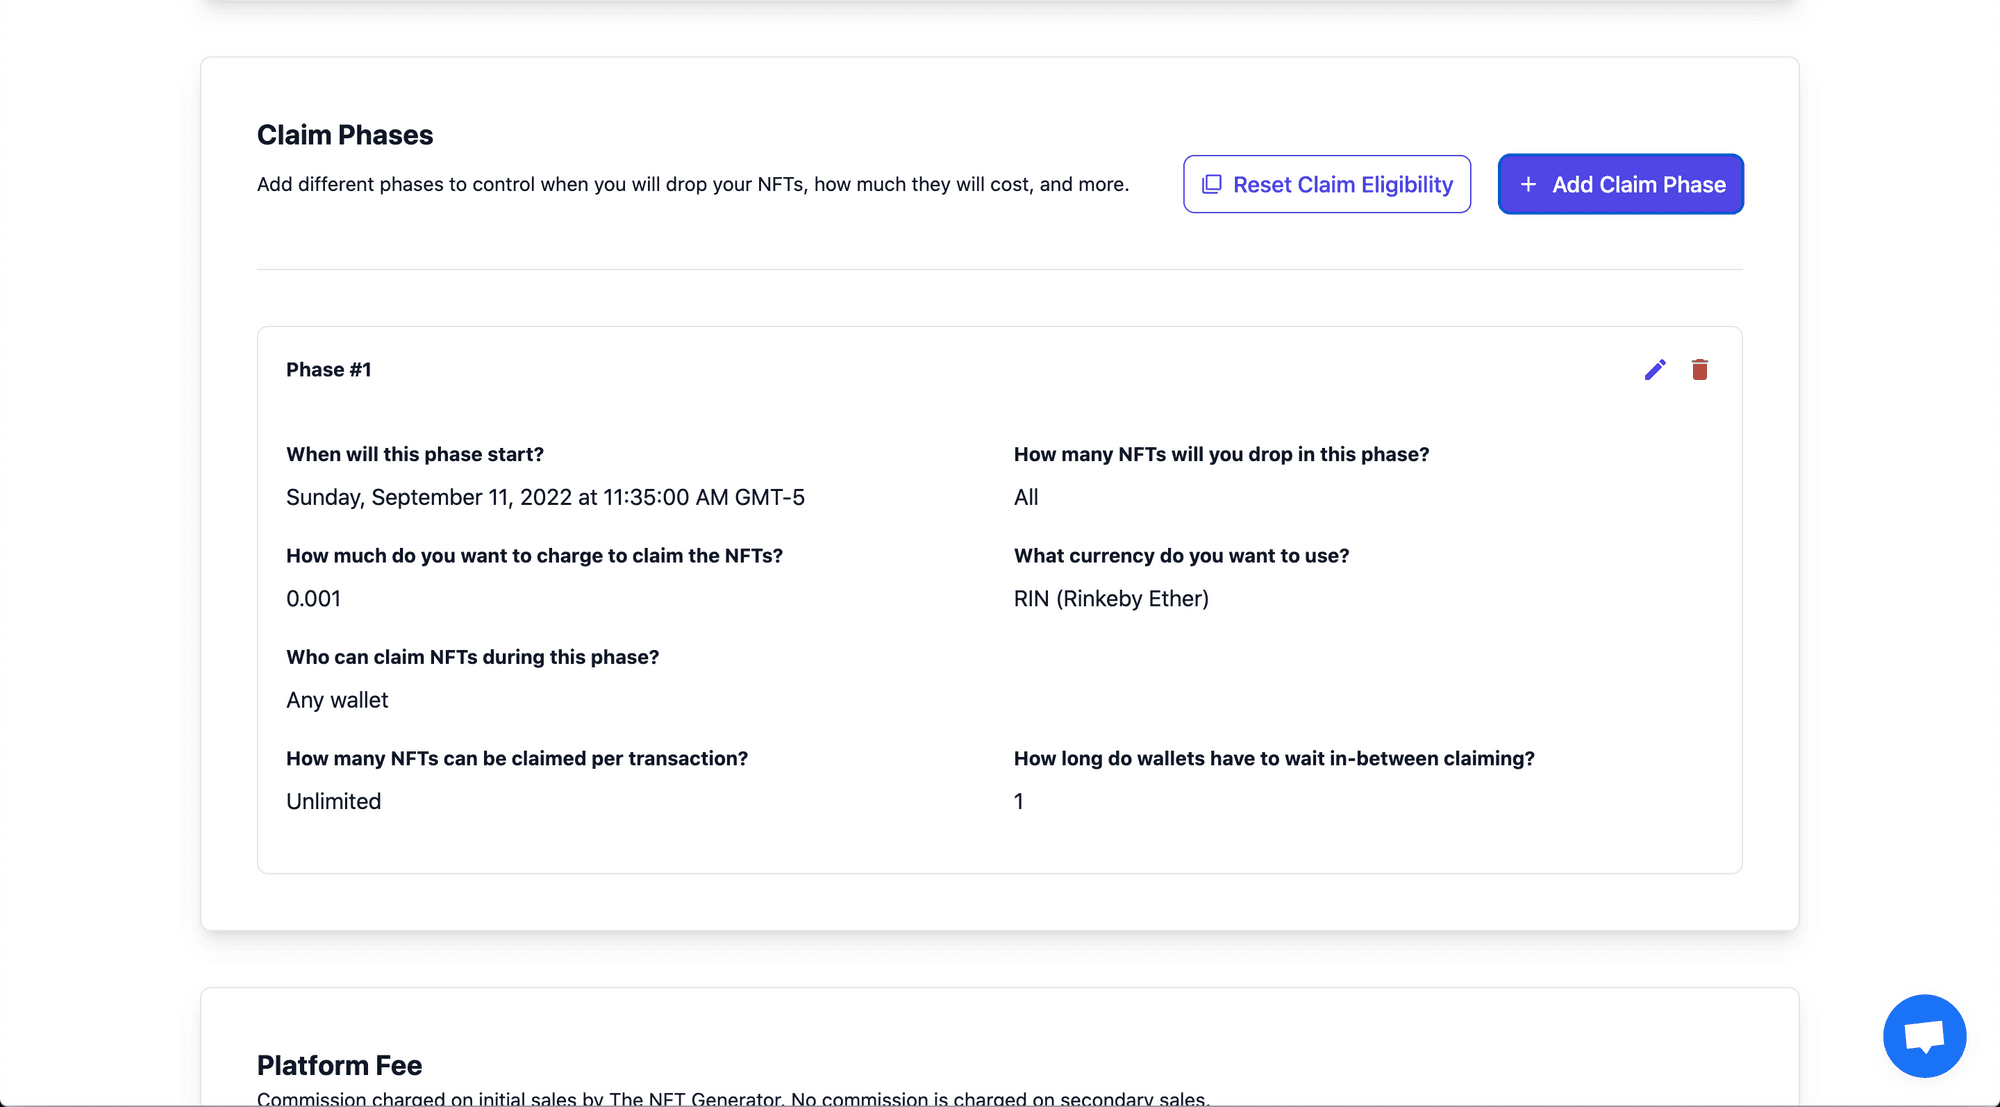
Once you have created a claim phase it will show up under “Claim Phases” as it is shown on the picture above. You can create as many claim phases as you want and as we’ve mentioned before a claim phase corresponds to private sale, pre-sale, public sale, etc.
Likewise, keep in mind that until the date and time of your claim phase arrives your community won’t be able to mint your NFTs. This is simply because the time has not arrived yet. Once it does they will be able to mint them - so don’t fret.
Testing it works
Ok, so now that we have our NFT drop ready to go let’s test it by minting a few NFTs and seeing them show up on OpenSea’s website for testnets.
Creating the smart contract
1. Mint on the premade website
Awesome! So now you are ready to launch your NFT collection and host your mint event with your community.
In case you don’t have a website (or simply don’t feel like doing one) The NFT Generator makes one automatically for you with every NFT drop smart contract created.
Click on “Premade Website” and it will take you to the page where you can edit some details about the website such as the cover image, and adding your social media channels such as Discord, and Twitter. It will also show a link to your smart contract on Etherscan.

To share the link to your premade website simply click on “Share” and the URL will be copied. You can then go and paste it on all your social media channels so people can go to the minting website on the specific date and time you set for the mint event to happen.
In case you do have your own website we also have a mint button that you can copy-paste into your custom website. Or you can simply make your mint button be a link to our premade website as well.
When the date of your mint arrives your community will be able to go to the premade website and click on the “Mint” button to mint your NFTs. This is how it will look like:
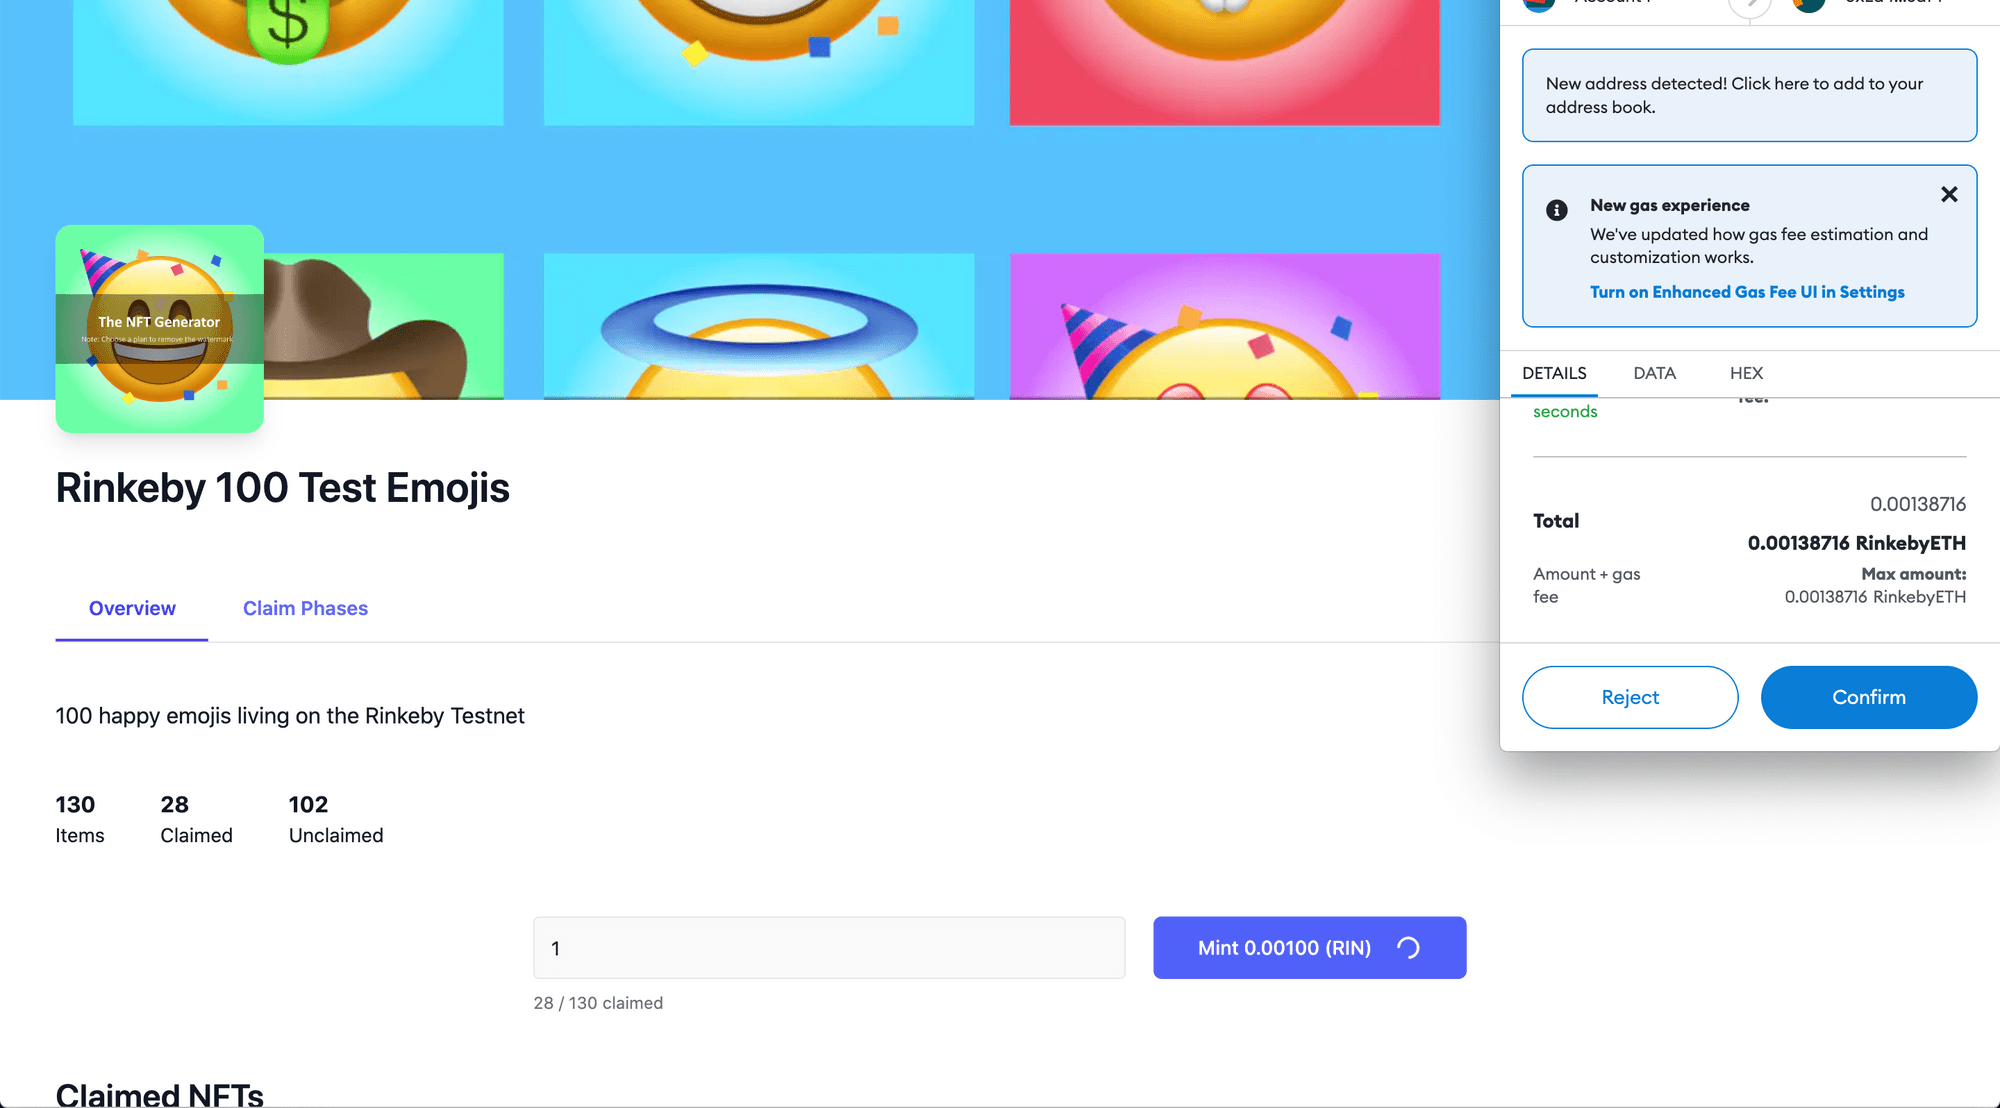
Your community will be able to simply click on the “Mint” button and mint your NFTs. The proceeds will be automatically fowarded by the smart contracts to the address you specified when you created it.
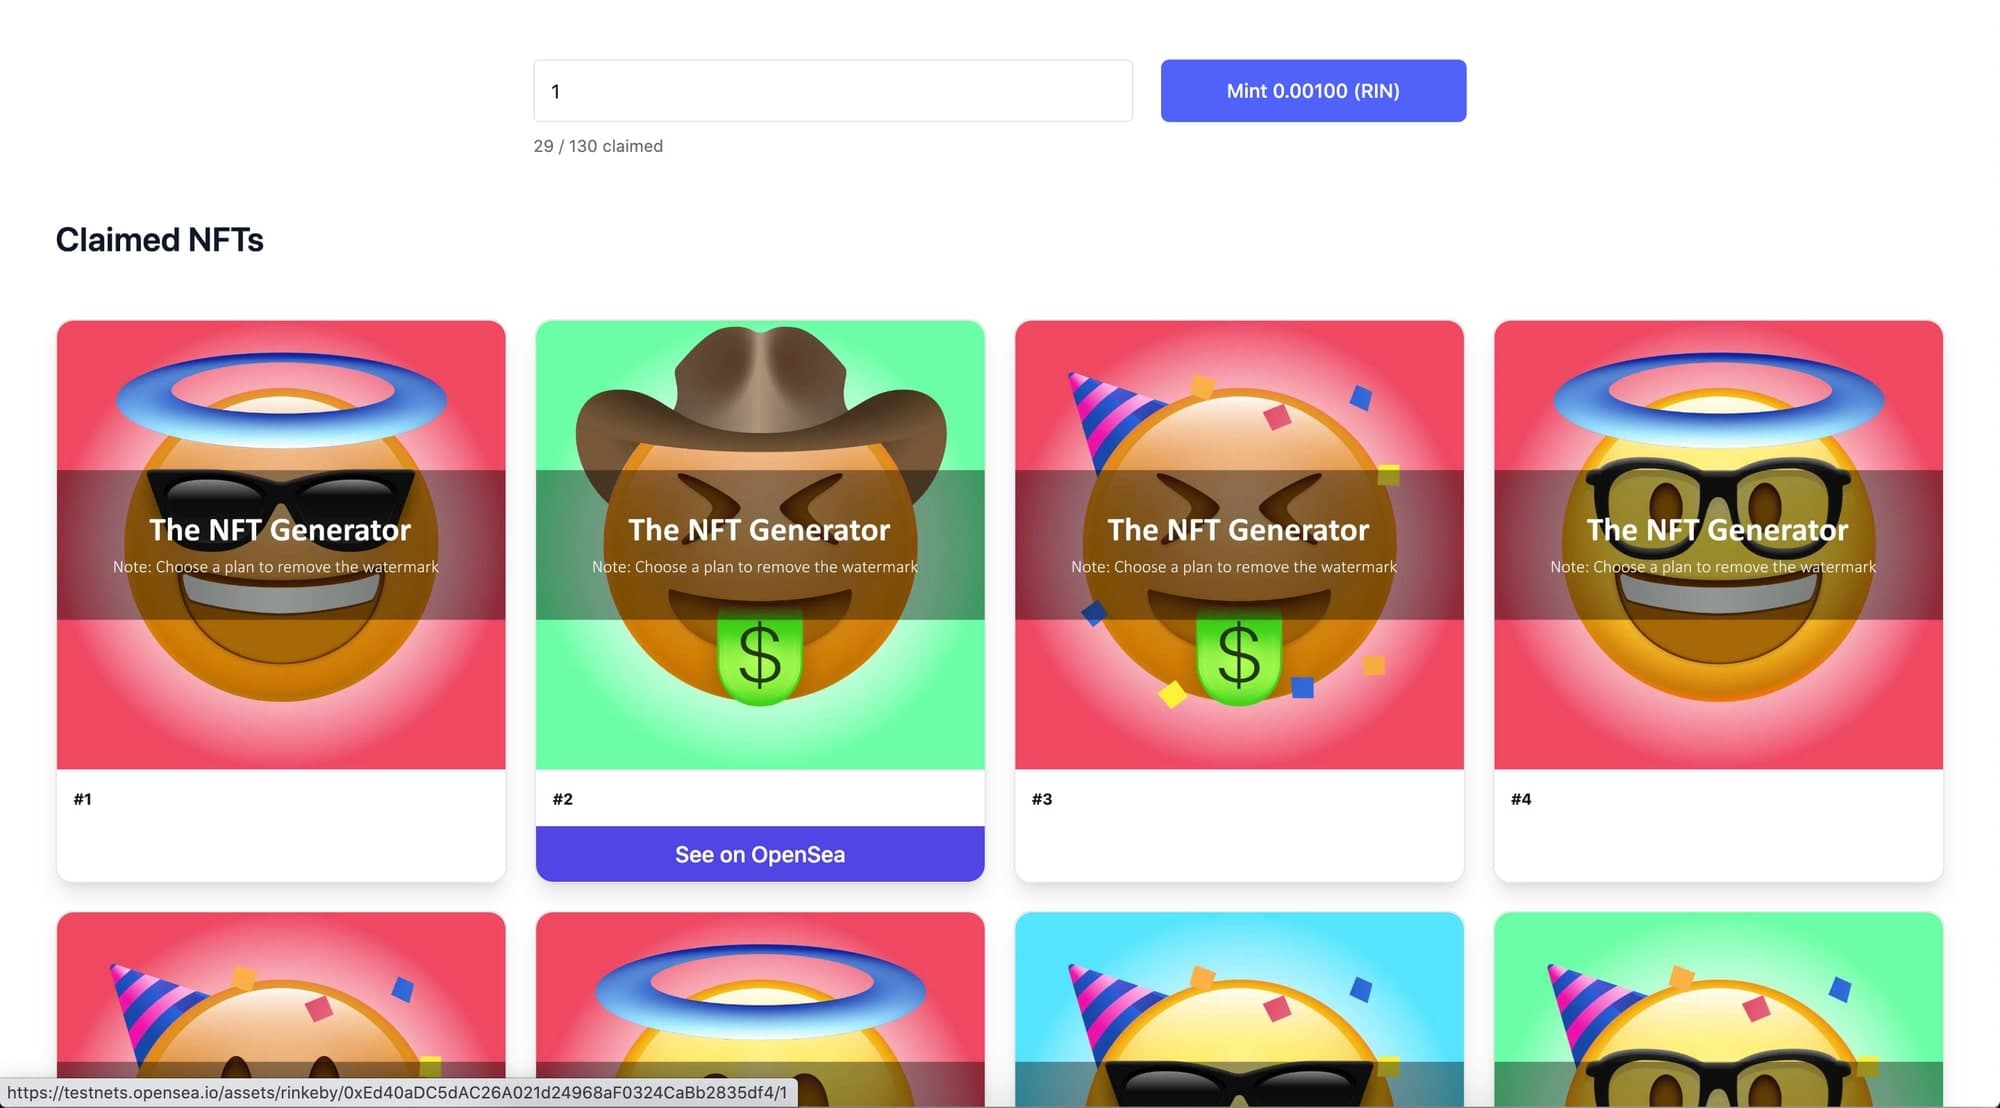
The minted NFTs will start to show up on the premade website under “Claimed NFTs” showing your community how great your sale is going.
If you place the mouse on one of the claimed NFTs you will see that a button called “See on OpenSea” will show up as it is shown on the picture:
If you click on the button it will take you directly to the OpenSea’s website for testnets (or mainnets if you deployed on the Ethereum mainnet).
2. See them show up on OpenSea
You will be able to see your NFT on https://testnets.opensea.io/
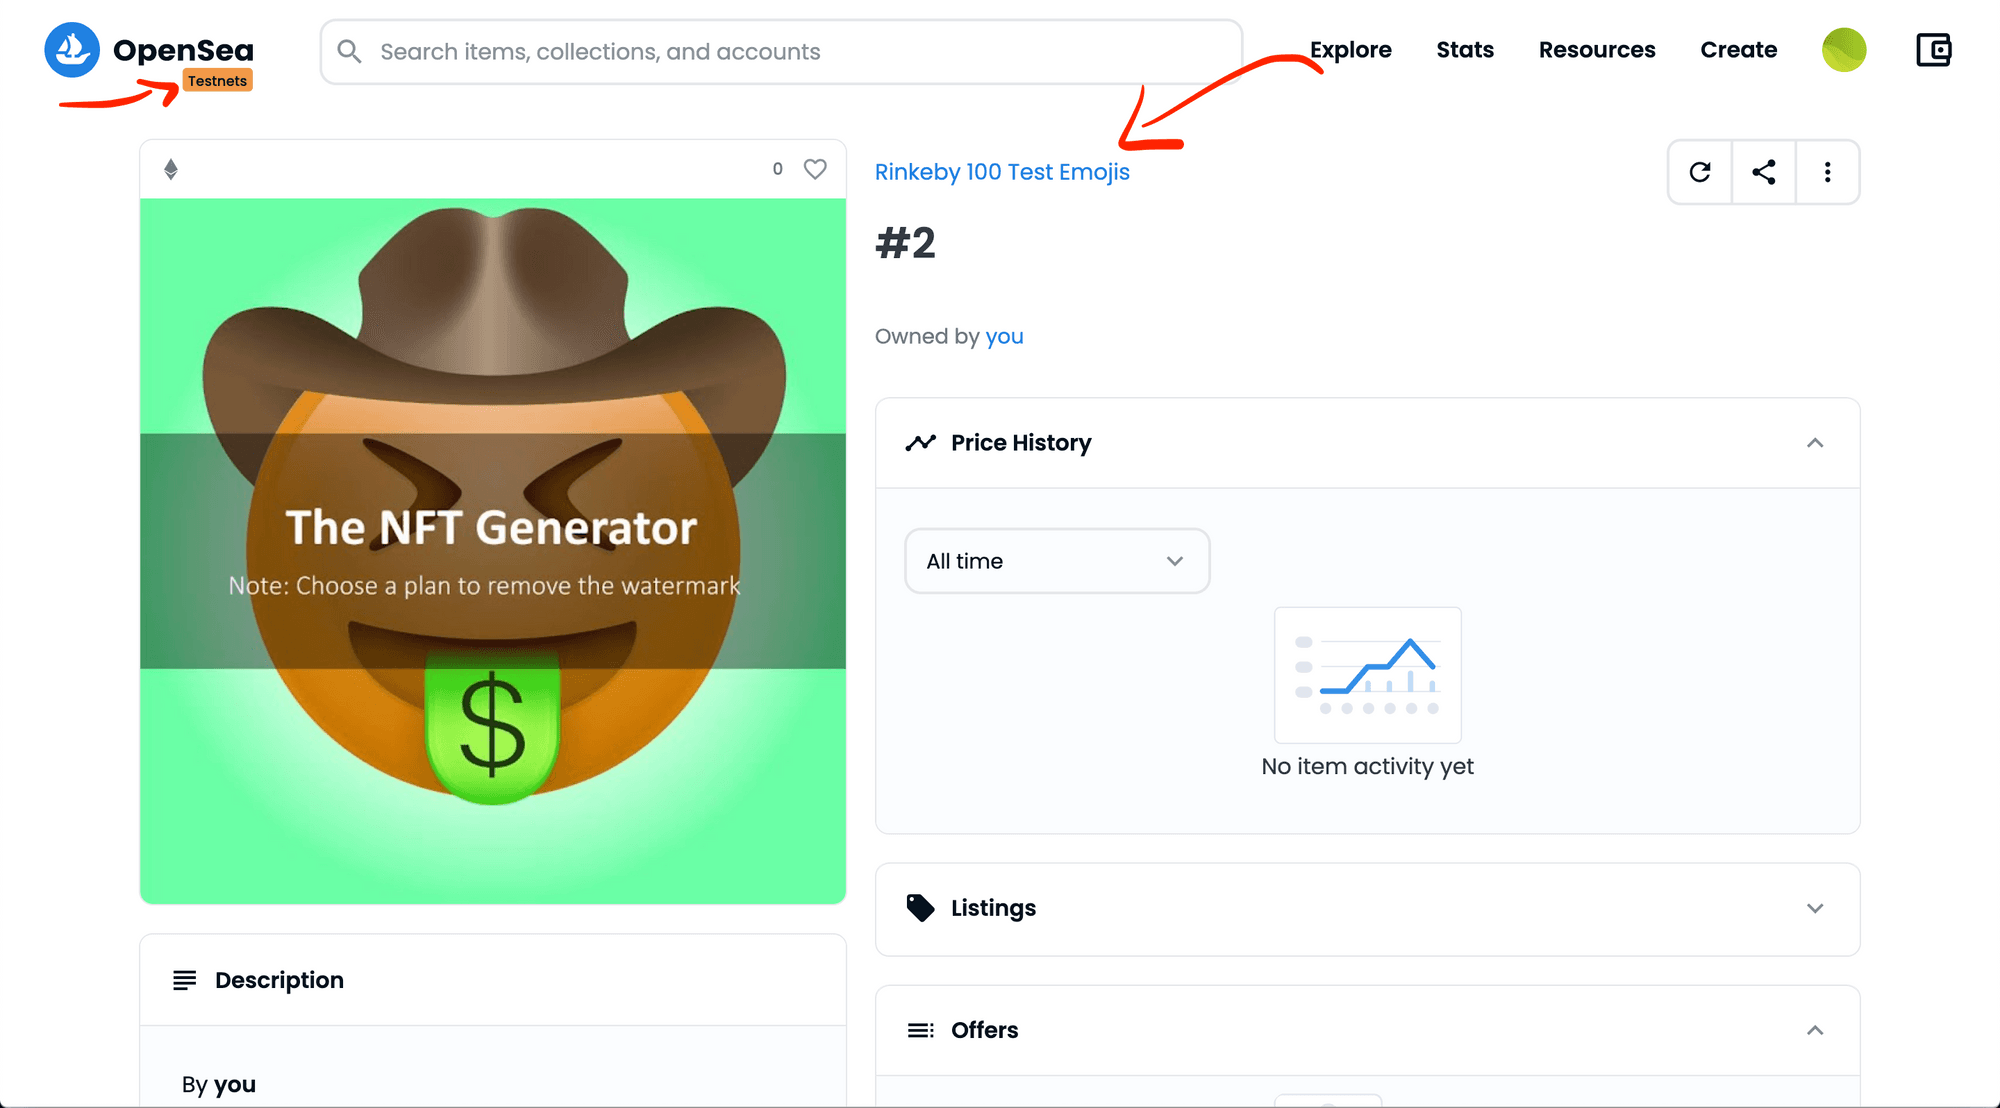
Check out our “Rinkeby 100 Test Emojis” collection on OpenSea to see how it all works.
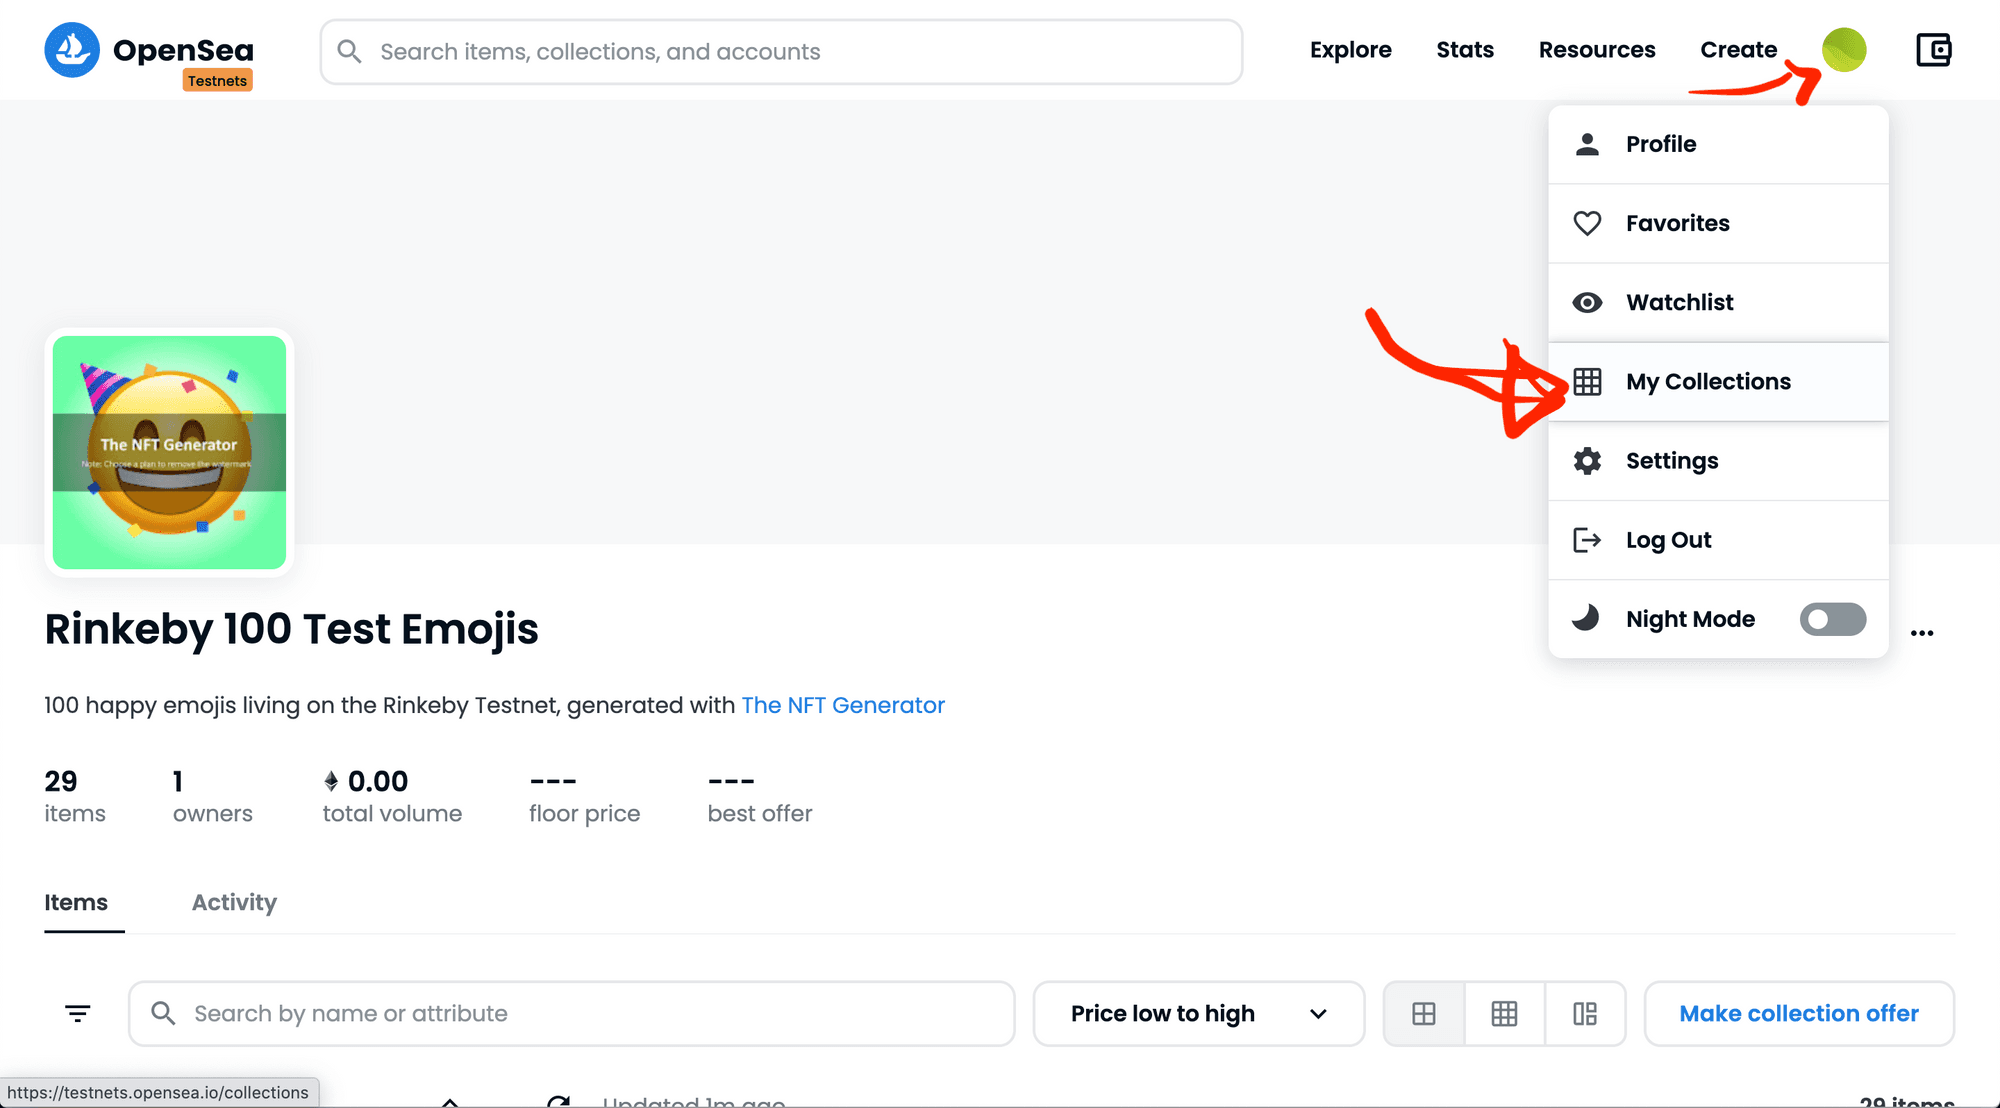
In case you want to change the banner of your collection you just need to log in into OpenSea with the same wallet that you used to create your smart contract and it will automatically show up there.
Then you just need to click on your profile picture to the left of the wallet icon, then click on “My Collections” and you will see your collection there as it is shown on the next picture.
3. Check your wallet on the Rinkeby testnet
That’s about it!
If you want to check that it’s all working you can check your wallet on https://rinkeby.etherscan.io/
Your proceeds will show up under internal transactions and the wallet balance will increase by the amount of net sales that you have.
Test before launch
We included testnets into our NFT drop smart contracts tool so you could fully test and get comfortable with the platform without having to spend real Ethereum.
We encourage you to use it and fully test it to get to know the tool before deploying on Mainnet - and if you have any questions feel free to reach out!